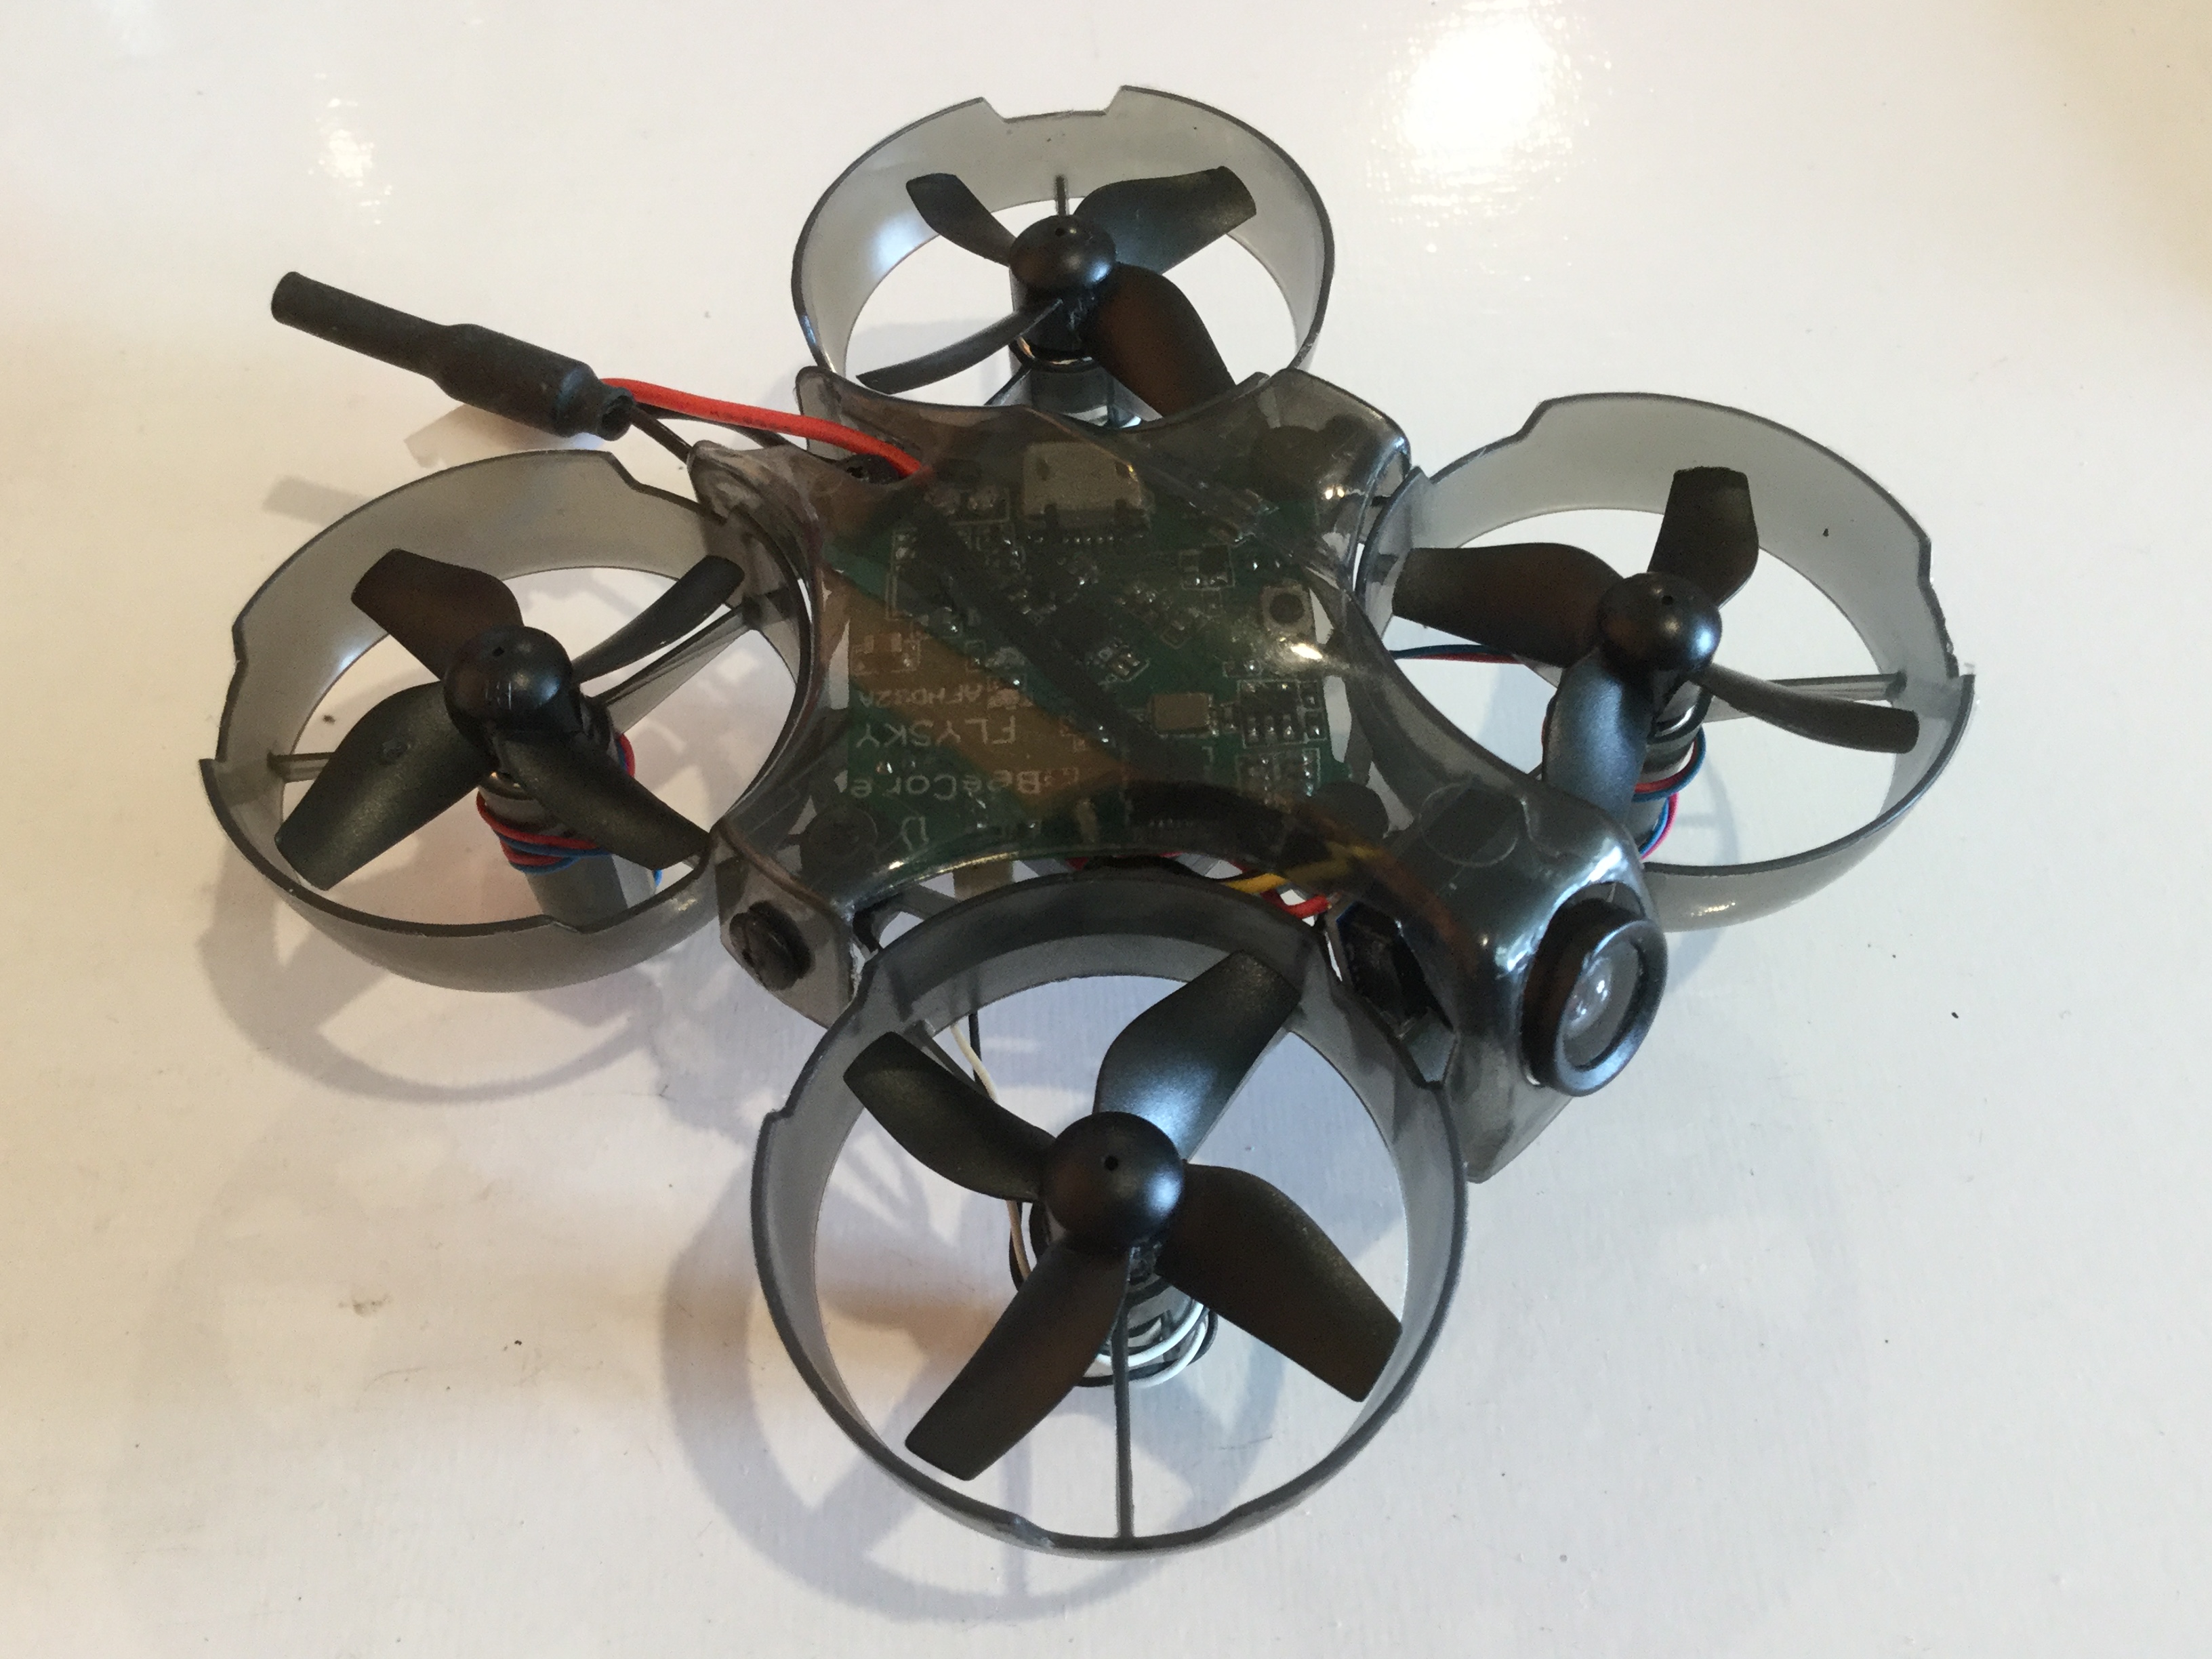
 This is a newbie’s quickstart guide for the Flysky i6 transmitter (TX) and the Beecore flight controller (FC). The guide assumes that you have a fresh Beecore-based Tiny Whoop build and that you already have your USB drivers and Betaflight Configurator installed.
- BIND
We will bind the Flysky i6 to the receiver built into the Beecore. Binding simply means that the Flysky i6 will be able to control the Beecore.- Press and hold the bind button on the Beecore and plug in the battery. Watch for the rapid flashing LEDs which indicates the Beecore is in binding mode.
- Press and hold the bind button on the Flysky i6 and slide the power switch on. Watch the flashing LEDs if it has slowed down which indicates the Beecore is now bound.
- Power off both the Flysky i6 and the Beecore.
- ASSIGN CHANNELS
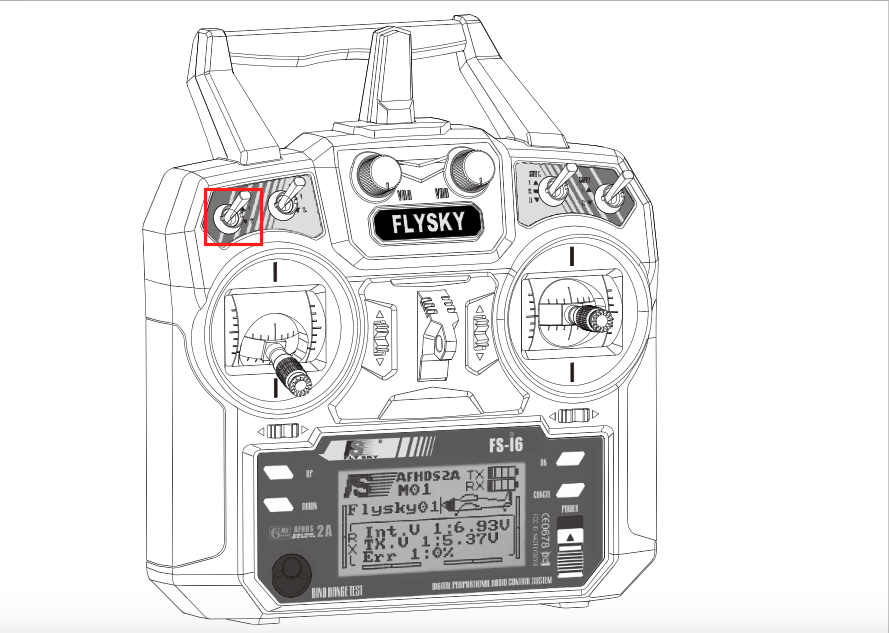
We will now assign radio channels to controls. Assigning channels allows controls to send radio signals when operated by the pilot. For this guide, we will simply assign Channel 5 to SwA
- Power up the Flysky i6
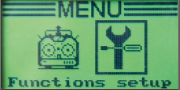
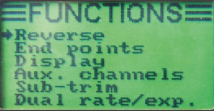
- Select Functions setup
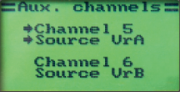
- Select Aux. channels

- Change Channel 5 source to SwA.
- CONFIGURE BETAFLIGHT
- Launch Betaflight Configurator on the PC
- Plug the Beecore to the PC using the micro USB cable
- Press the connect button
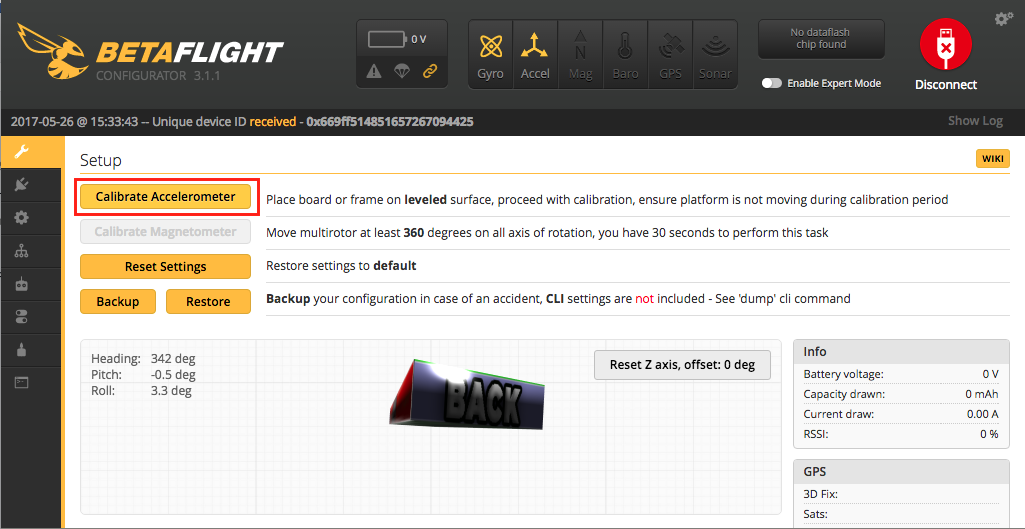
- Please quad on a level surface and calibrate accelerometer
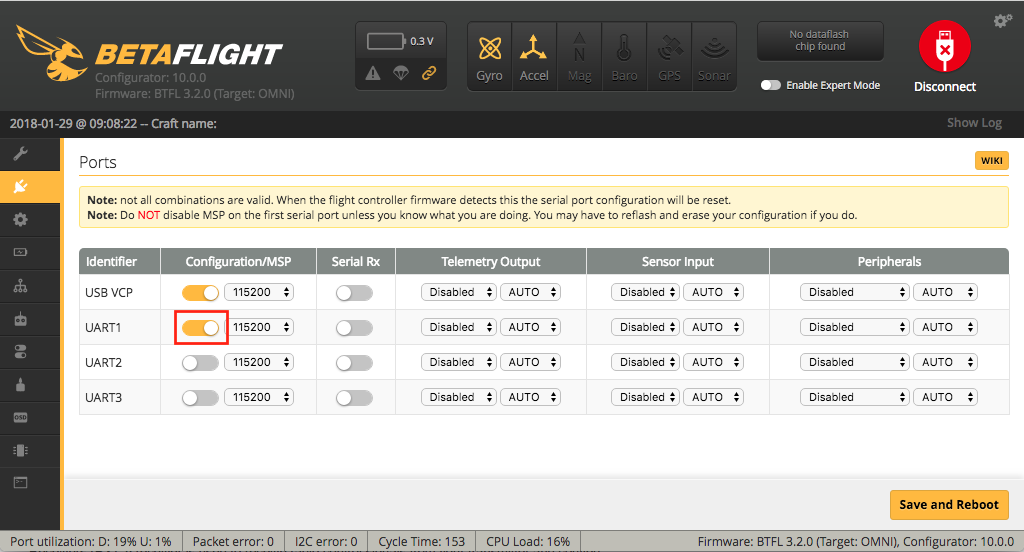
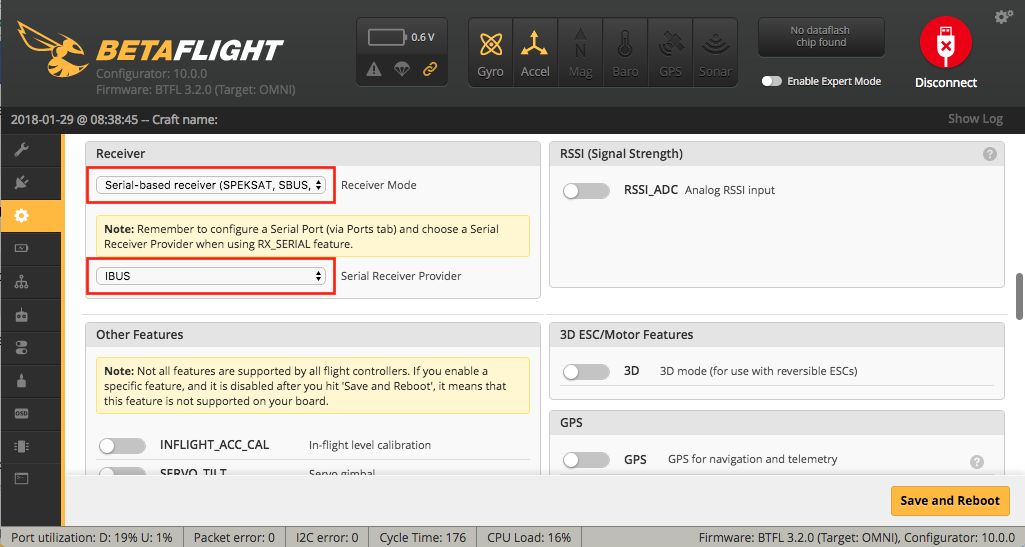
- Check RX configuration
For Beecore:
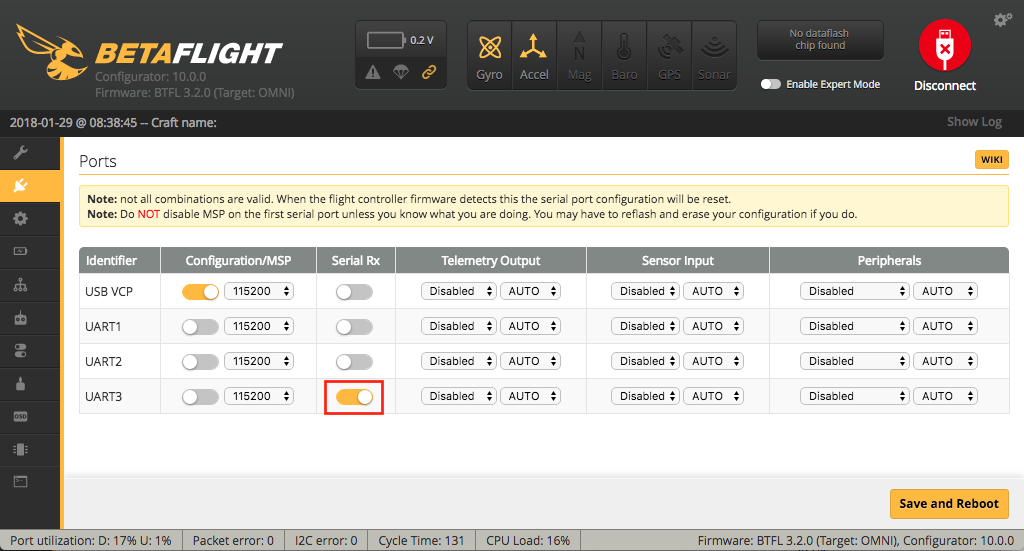
For Beecore V2:
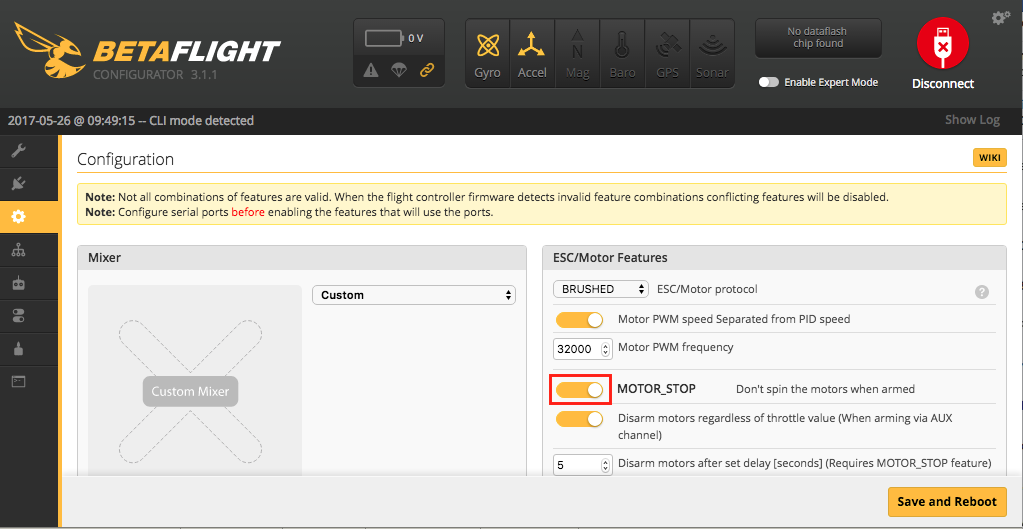
- Set MOTOR_STOP to ON. Click Save and Reboot.
- Check RX configuration. These are default values but check just to make sure.
For Beecore:

For Beecore V2:
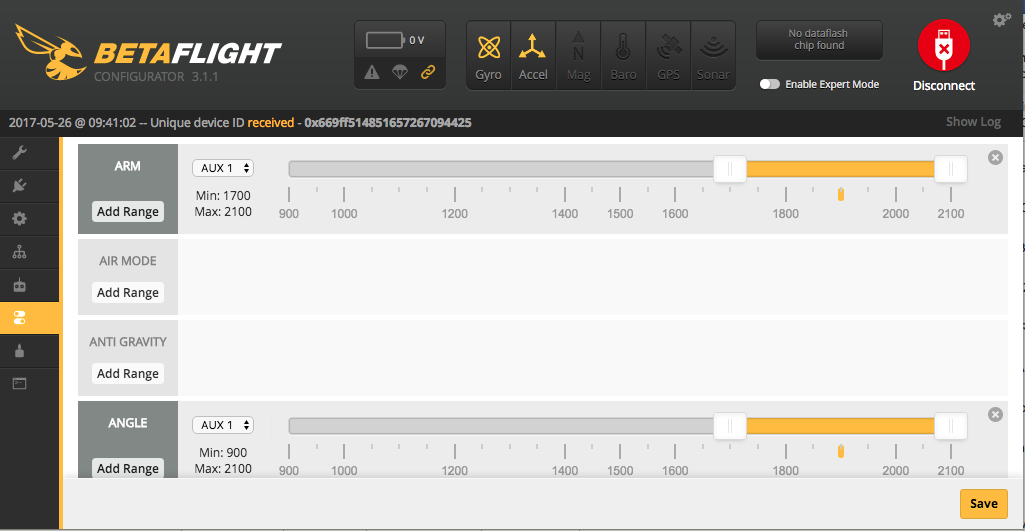
- Select Channel Map AETR1234. Move sticks and SwA. The colored bars for roll, pitch, yaw, throttle, and AUX 1 should respond correctly. Click Save.

- Add Range for ARM and ANGLE. Select AUX1 from the dropdown for both ARM and ANGLE. Drag the sliders to highlight the range around 1700 to 2100. If your SwA is on the down position, a yellow tick mark should be pointing at around 1900 on the range you defined. Click Save.
- Click Disconnect.

If everything is correct, you should now be able to power up your quad, power up your transmitter, flip the arm switch (SwA), and take-off!