I got a plastic vernier caliper for measuring watch parts. I got a plastic one because it’s (1) cheaper and (2) it will not scratch the watch.
A caliper is a device used to measure the distance between two opposite sides of an object. A vernier scale is a device that lets the user measure more precisely than could be done unaided when reading a uniformly-divided measurement scale (such as a ruler). A vernier caliper is therefore a caliper equipped with a vernier scale for precision measurements.
It has a main scale (in this case, in mm), a sliding vernier scale (in this case, with graduations that correspond to 0.05mm), inside jaws (upper, smaller jaws on picture) or the outside jaws (lower, bigger jaws on photo).
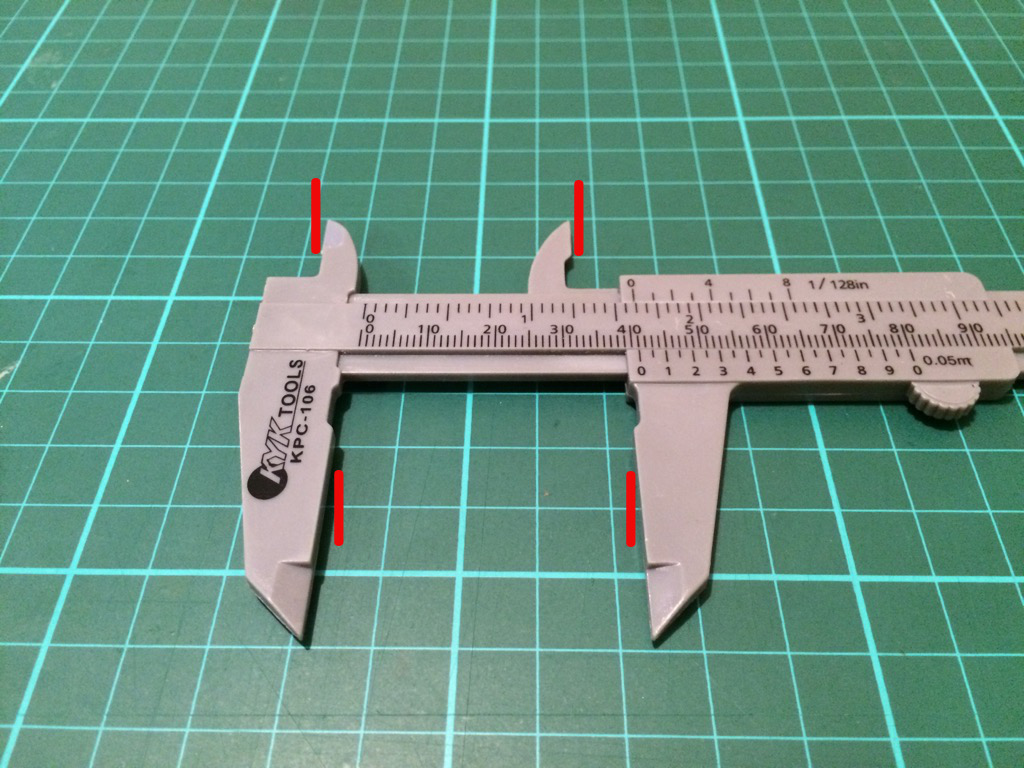
The inside jaws is for measuring the distance from inside of objects like lug widths (inside distance between the lugs of a watch). The outside jaws is used for measuring from outside of objects like length, width, height, case diameter, and lug-to-lug distance (distance between the tip of the top lugs to the tip of the bottom lugs).

Simply slide and position the jaws lightly on the object to be measured and read the scale. In this case, the “0” index on the vernier scale points a bit over 41mm on the main scale. How much is a bit over? Find the index on the vernier scale that lines up with the index on the main scale. In this case, it’s 2. Thus the distance is 41mm + 0.2mm or 41.2mm (with a ±0.05mm error).
That’s all there is to it :)