This is a newbie’s quickstart guide for the Flysky i6 transmitter (TX) and the Happymodel Crazybee flight controller (FC). The guide assumes that you have a fresh Crazybee-based whoop build or bind-and-fly (BNF) such as the UR/S/K65, Mobula6, or Moblite6.
BIND
We will bind the Flysky i6 to the receiver built into the Crazybee. Binding simply means pairing the Flysky i6 so that it will be able to control the Crazybee.
-
-
- Press and hold the bind button on the Crazybee and plug in the battery. Watch for a blinking red LED which indicates the Crazybee is in binding mode.
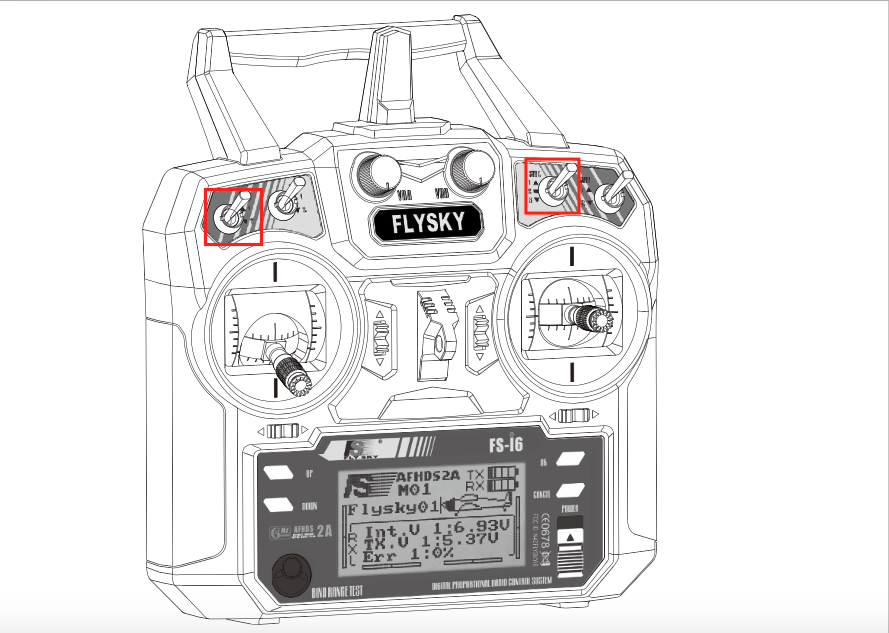
- Press and hold the bind button on the Flysky i6 and slide the power switch on. Watch for a solid red LED which indicates the Crazybee is now bound.
- Depending on your board and firmware version it may be a blinking red LED at the start and then solid red LED once bound or vice versa. That is, solid red LED at the start and then blinking red LED once bound. The key is to observe if the LED behavior changes when you bind on the transmitter.
- Power off both the Flysky i6 and the Crazybee.
-
ASSIGN CHANNELS
We will now assign radio channels to controls. Assigning channels allows controls to send radio signals when operated by the pilot. For this guide, we will simply assign Channel 5 to SwA and Channel 6 to SwC
-
-
-
- Power up the Flysky i6
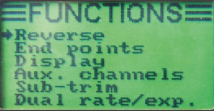
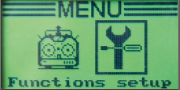
- Select Functions setup
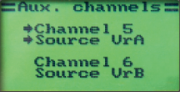
- Select Aux. channels

- Change Channel 5 source to SwA and Channel 6 to SwC. This assigns the switches for arming and selecting flight mode (angle/horizon/acro), respectively.
If everything is correct, you should now be able to power up your quad, power up your transmitter, select flight mode using the mode switch (SwC), flip the arm switch (SwA), and take-off!
-
-